Showing posts with label Craftiness. Show all posts

Thursday, May 19, 2011

Sticks and stones may break my ... jeans?

My daughter has always been pretty easy on her clothes. We get a lot of things passed down to us from a cousin, and by the time we are ready to pass them on again, they are usually in the same condition as they were when we acquired them (with the exception of paint splatters here and there ... she's an artist, you know).

However, this past year we started something new: Kindergarten. And wow ... has she ever been mean to her clothes recently! She's got holes in shirts that I thought were indestructible, and those school lunches ... let me just say the stains are nearly impossible to remove! Mostly we don't mind a little stain here and there, but the holes are a force to be reckoned with, particularly in the knees of her jeans. She is pretty laid back when it comes to fashion, but she will not, and I mean NOT wear jeans if they have "knee holes".  Like these for instance:


Perfectly good pair of jeans, not ready to be thrown out, but not being worn. Well, I finally found a solution to the problem that we both love. I get to go for a while longer without ditching clothes unnecessarily, and she gets to wear something she thinks is amazing. It's a simple patch job.

Now, before I start in on my instructions, let me make clear that I am not a pro. What I did today was the first time I've ever tried to patch something, and I threw it together using knowledge from other projects I've done in the past. This might not be the "right" way to do this ... but it worked for me. If you have tips I would love to hear them!

Okay ... so what you need:

  • A pair of jeans with holes (or without - if you are just feeling extra creative one day!)
  • A small scrap of coordinating fabric
  • Embroidery floss to match the fabric
  • Iron-on adhesive (I use Heat-n-Bond ... LOVE this stuff)
  • Cardboard for template (optional)
  • Needle and scissors ... no machine necessary!!

The first thing I did was to make some cardboard templates:


This step isn't 100% necessary, especially if you are a pretty decent artist. You could draw directly onto the back on the Heat-n-Bond if you wanted to. I like to use a template because I save them for later if I ever need it again. 

Next, you iron your adhesive onto the wrong side of your fabric. Make sure you follow the instructions that came with the adhesive that you are using. Mine says to iron for 6 seconds ... easy peasy.


Then I used my cardboard template to trace the pattern (hearts in this case) onto the paper-back of the adhesive. Remember if you are using a template that has a right versus a wrong way (like a letter for example) you'll need to trace your template upside down.


Next, cut out your pieces and lay them out on the jeans to decide where you want them to end up. I wanted to cut out more than just the hearts to cover the holes in the knees ... just a single knee patch wouldn't have looked right in my opinion. 


Then you iron the pieces down, again following the manufacturers instructions (mine said to iron 2 seconds, I went just a bit longer since the jeans are thick). Next break out the embroidery floss and stitch the pieces down with a simple backstitch. I used 3 stands of floss, doubled for a total of 6 on the needle at once. To do a backstitch, you come up through the fabric, then go down back to the underside about 1/4" away from the beginning stitch, then up again 1/4" away from when you stitched down ... and then back down in the spot where you stitched down before. Wow ... that sounds WAY more confusing than it really is. Here are a few pictures that should help. You also can see what the back of the fabric will look like:


I like to do one more good press with the iron after all that stitching, and then you should be ready to go!


She loves them, and I do too! 

Now if I could only think of a creative way to save my son's jeans, I would be in good shape! Something makes me think he really wouldn't appreciate the hearts on his knees ...

Monday, January 24, 2011

Out with the old t-shirt, in with the new summer top!

This past Sunday I had a "summer bug" and needed to create something summery before these doldrums of winter just wore me out! So (after building a snowman with my kids), I took an old t-shirt of mine and turned it into a cute summer top for my daughter! It was super easy and went really quickly! Here are the instuctions:

You'll need:
  • old t-shirt
  • scissors
  • elastic thread
  • regular thread
  • ribbon
Okay, here we go ... first, do a little online research on "shirring" fabric. I'll give you a quick breakdown here, but I watched a few videos on YouTube before I attempted this project. Here is the video that I found most helpful.

Second, find an old t-shirt in your closet that you don't want anymore. This one was a medium or a large, and was just a bit short on me:


Next, cut it right below the arm holes. This step doesn't have to be exactly perfect (one more reason to LOVE this project!) and a rotary cutter is nice, but not necessary. I actually cut the front of the top a little higher than the back - and not intentionally - but the end result is still super adorable and actually looks like I designed it that way (and only you know differently!!):


Next ... get ready to shirr the fabric! 
  • You'll hand-wind your sewing machine bobbin with the elastic thread, being careful not to stretch it too far while winding. Then just place in your machine as usual. Use regular thread on the top of the machine. I used orange on the top to match the fabric, and plain white elastic in my bobbin. 
  • Then you will want to set your sewing machine tension about as high as it goes (I cranked mine up all the way).
  • You'll also want to use the longest straight stitch that your machine allows.
  • Finally ... keep in mind that while sewing you will want to gently pull the fabric in the front to get the "stretchiness" right. I would recommend sewing on some scrap fabric first to get the feel of it before beginning (or else you'll have to rip out a few rows and start again, like I did)
I didn't mark my fabric, but used my sewing machine's foot as a guide to make my stitches about a quarter to a half inch apart:


No need to hem down the top (though you could) if you are using a t-shirt as it won't fray, and it ruffles beautifully. 

That's about it! I could have been done here, but my fabric didn't gather as much as I wanted, so I had to add some straps to ensure it didn't fall off of my little girl. If you want to add some straps, just try it on your model and pin the straps in place where you want them:

Then I used a plain old zigzag stitch (but remember to use regular thread in your bobbin and re-adjust your tension) to stitch the straps in place. Then you are finished!


After all was said and done I added a little embellishment to the front using some buttons I had in my stash ... but it's really not necessary. I love this project because it's adorable and super easy! I plan to make many, many more this summer! Time to hit some thrift stores! 

Monday, October 18, 2010

Truffula Tree noteholder

My daughter's Kindgergarten room is decorated in all-things-Dr.-Seuss. So when her teacher's birthday was approaching, I wanted to make her something that would go along with the decor, but also be incredibly crafty and easy enough for my 5 year old to help put together. So the following noteholder was born:


If you are familiar with Dr. Seuss' "The Lorax", then you'll recognize those bright colored tufts as Truffula Trees (and if you are not familiar with "The Lorax" then you are really missing out on a great book)! 
This craft was super easy to make, and my daughter was able to put most of it together on her own.

1. Gather your supplies. You'll need:
  • A foam ball (size will depend on the size of your desired finished project)
  • Chenille stems aka pipecleaners - green (we used 3 varying shades, about 16 per color), 3 yellow
  • Green paint (we used 'spring green')
  • Thin feather boas in pink and green
  • Paintbrush, black permanent marker, jewelry wire (see step 2), craft knife
  • Super-excited helper (optional)
2. Using the craft knife, cut the foam ball in half. I found that the easiest way to do this was to make a slit in the foam all the way around, and then I wrapped the jewelry wire around the ball and pulled tight, and this made a perfect cut. If you have a longer craft knife I'm sure you could use that instead.
3. Paint the half of the foam ball green - perfect job for little hands - and let dry:
4. While drying, prep the chenille stems: 
     Green : Cut each stem into fourths (we didn't do exact measurements, just folded in half twice and cut). Then take each fourth and fold in half without cutting - this leaves the 2 "pointy" sides together so that the finished product won't have any sharp edges).
     Yellow: These will become the trunks of your truffula trees. Take a bit of a feather boa and wind into a loose ball, then wrap the chenille stem around the middle of the ball, bend the stem around the center of the ball, and then twist the ends tightly to secure it in place (see below). Then, use the permanent marker to draw random and slightly haphazard black lines on it. 
 5. Place the finished trees into the foam ball by poking the stems into the foam. No need to glue!
6. Add the green "grass" by poking the pointy ends of the green stems into the foam ball around the trees. We didn't use any sort of system on this step, we just started adding them randomly and filling in 'gaps' as needed.
7. Write a fun note on a small scrap of paper and smoosh it between the blades of grass, then show it off, because it's SO ADORABLE!


Sunday, August 15, 2010

The easiest finger puppets ever!

A while back, I tried to have the kids make their own puppets out of paper lunch bags. I figured it would give them something new thing to play with, something they would be proud of and would keep for a while. The craft went well, and I thought the puppets were SUPER cute, but the kids didn't play with them long. In fact, I think the excitement only lasted about 10 minutes.

The problem with the paper bag puppets was that they were too big and awkward for little hands to maneuver. So then, these little dolls were born. They let the kids use their fingers as "legs" and the thumb and pinky finger as "arms", and they were easy enough for even my 3 year old to play with.

Take a look at our fancy and cheap puppets:


If you wanna make your own:

1. Cut out a pear-shape on a piece of construction paper or card stock. The card stock would probably be better, our construction paper puppets got kind of droopy after a while.
2. Cut out two "finger-holes" at the bottom, wide end of the pear-shape. These are for the "legs".
3. Have the kids draw on a face and clothes.
4. Cut some hair out of a separate piece of construction paper. glue to the back of the head and then add ears, a hair bow, earrings, etc.
5. PLAY!

The kids played with these in a dollhouse for nearly 2 hours! The only reason they quit was because the paper started to tear and the puppets started to fall over. Next time, we'll use card stock. I just have to go and buy some first!!

Thursday, August 12, 2010

Homemade Sidewalk Paint

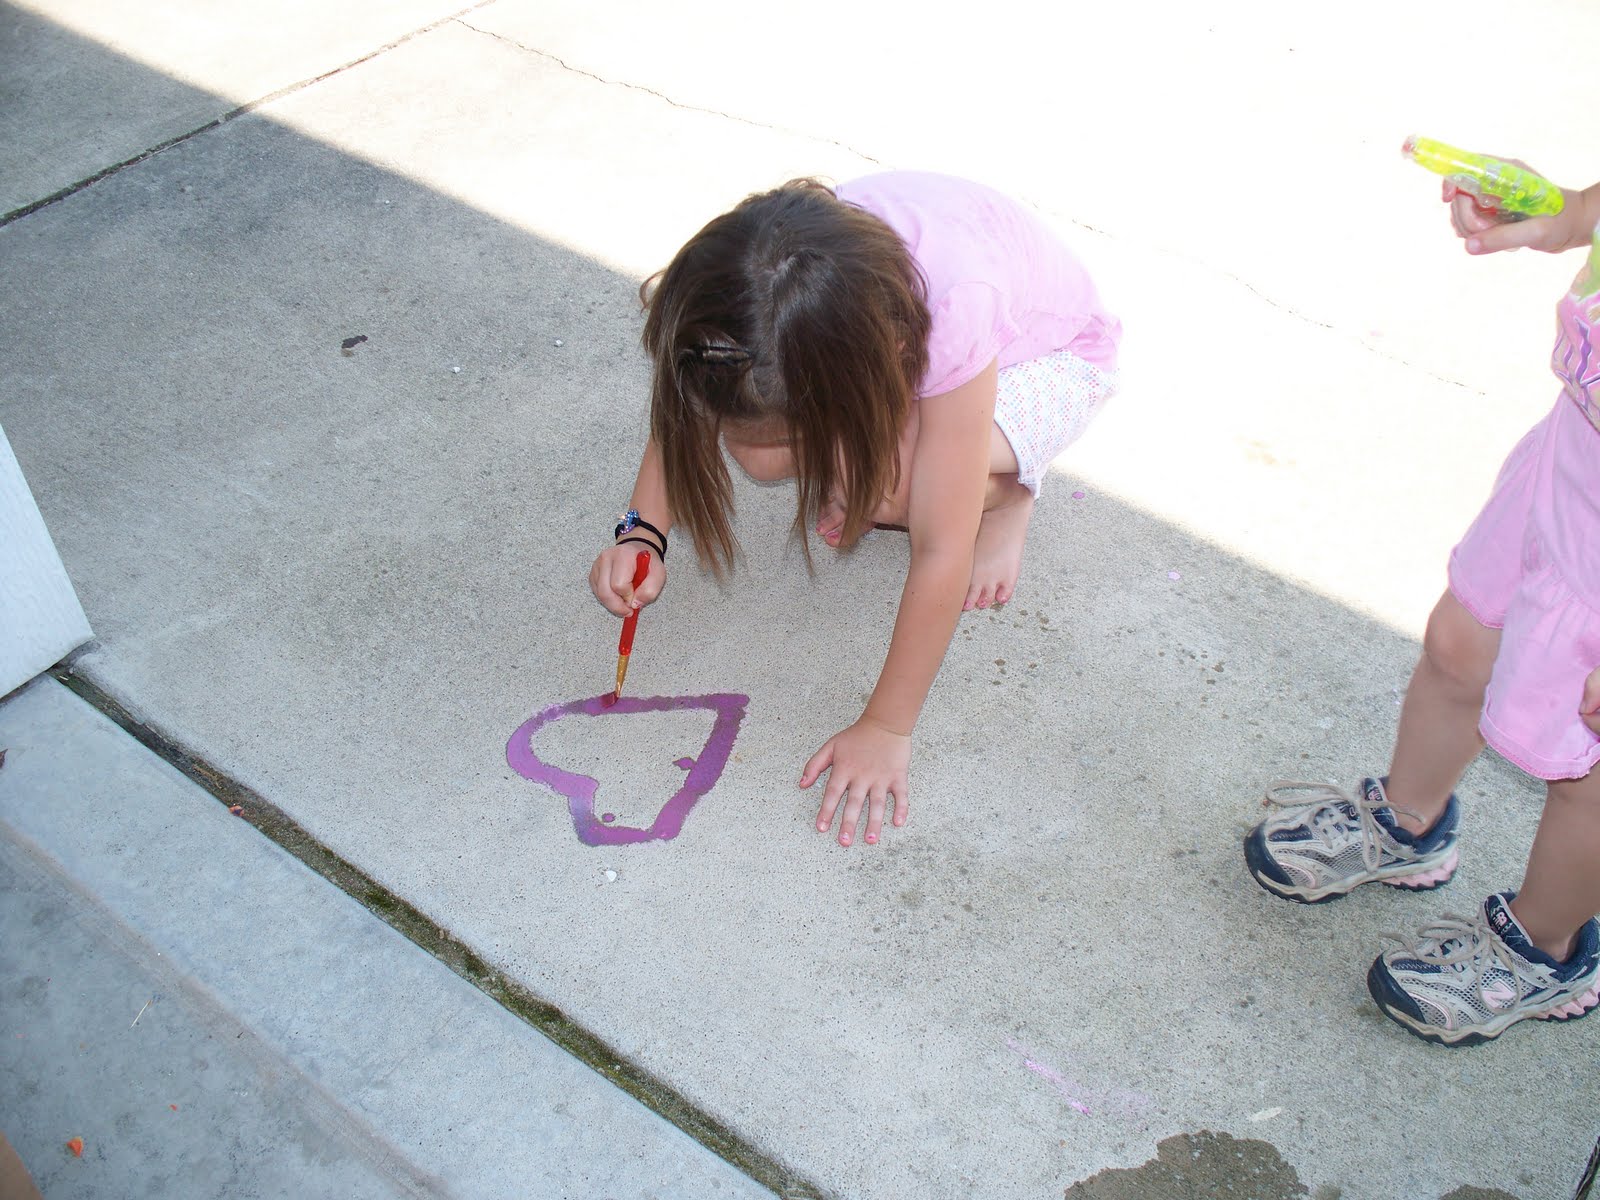
I love sidewalk chalk. To me, sidewalk chalk is a mother's dream-come-true for her artistic children. There is usually more than ample space for the kids to draw, and it washes away easily with a hose or a steady rain.

However, my kids prefer painting over coloring. Something about that brush makes them feel extra creative and excited. So I did a little research online for an inexpensive paint to use outside that would wash away as easily as sidewalk chalk (and that is totally non-toxic) ... and I found the perfect "sidewalk paint".

Mix together equal parts cornstarch and water in a large bowl. Pour into individual cups or bowls and then add food coloring to make different colors. Then paint like crazy on the sidewalk!!


I found that an old styrofoam egg carton was the perfect container for the individual paints. It gave the kids the opportunity to mix them to create even more interesting colors! I just filled only half of the cups and left the remaining empty.

Our paint washed away the next day with a good summer rain. Good thing it's easy to make more!

Sunday, August 1, 2010

Fun with felt - DONUTS!

I recently went to our local craft store to buy something totally unrelated to felt, and wound up walking out of there with about 60 sheets of the stuff, due to a well-placed "SALE" sign. So now, with a bunch of felt on my hands and kids in the house to entertain, I'm resolved to make as many neat things out of it as I possibly can!

My first project was felt donuts. These were super easy! Just cut out the basic shape, sew the outside shut (I did it by hand with a kind of whipstitch ... but you could totally use a machine), stuff with a tiny bit of batting, and then stitch the inside closed! Then I cut out different 'icings' for the kids to use for mixing and matching. I added 'sprinkles' to some of the icing by sewing with some thick craft thread and an embroidery needle.


My kids adore these! I think I'll probably make another few sets of them. If you didn't have really little kids in the house, you could even sew up some donut holes to go along with the set, out of the circle cut from the middle. But I was worried they'd be too small, so I'm saving those little circles for some other fantastic project .... I just don't know what that will be yet!

Thursday, July 29, 2010

Headbands and elastics and scrunchies, OH MY!

My daughter and I have been sharing a drawer for hair barrettes, combs, and clips for a while now. I don't mind sharing spaces with her, but she is getting more and more "girlie" every day, and we have been running out of space in our small bathroom to keep everything organized. So while I was at the dollar store recently, I spotted a box of 10 small, adhesive hooks for - you guessed it - $1.00 ... and I found her a space in the bathroom to keep her barrettes neatly organized.


She loves having her things hanging here, separated from mine. I think I might need to add a small mirror to the other door ... but of course then I might never get time to get myself all dolled up in my own bathroom anymore!

I think I'm gonna buy some more of those little hooks and try this neat trick in my kitchen! No more disorganized measuring spoons!

P.S. By the picture, I think my husband is excited at the prospect of no longer finding these things all over the bathroom floor! 

Sunday, July 18, 2010

Making an Idea Board

After cutting up a few old boxes a few months ago, I was left with 2 square pieces of cardboard laying around. It didn't feel right to throw them into recycling, so I decided to reuse them in a crafty kind of way.
I've always wanted one of those ribbon-laced memory boards that I used to see in everyone's college dorm rooms (except my own). I'm not sure if the ones that I have seen were made or purchased, but I didn't realize how EASY this project was until I tried it myself!

Here is how I created an "idea board" for my sewing/craft space out of 2 squares of leftover cardboard:

Materials: Cardboard, batting and scrap fabric (to cover front of cardboard), ribbon, hot glue gun and glue sticks,

1. Trim cardboard until it's relatively square. It really doesn't have to be perfect. Now, I imagine you could cut the cardboard out to any shape/size that you wanted. I almost made 2 matching boards but I decided to tape my 2 squares together to form one long rectangle.


2. Iron and lay out your fabric (right side down), then lay batting on top of fabric. Make sure that the batting exceeds the sides of the cardboard just a little (maybe a quarter of an inch or so), and the fabric should stretch at least an inch and a half around all sides.

3. Lay the cardboard piece on top of the fabric and batting. Working with one side at a time, stretch the fabric snugly over the cardboard and use the hot glue gun to glue the fabric to the back of the cardboard piece.


4. Once the glue dries, lay the ribbon out on the front of your board in the design that you would like. I used long pins to hold my ribbon in place while I glued each individual piece. Also, be sure you that you really pull the ribbon tight against the face of the board. If it's not tight it won't hold your things well. Once you've got the ribbon in place, glue to the back of the cardboard.

5. Finally, I used a heavy-duty needle and thread to sew (straight through the cardboard) buttons on all the placed where two strands of ribbon intersected. I glued a braided ribbon to the back to use for hanging, and hung on a push-pin on my wall.


This project is SO easy! None of the steps have to be perfect (notice no real measurements here) in order to get a fantastic end-result. Also, it's totally frugal even if you do have to go out and buy a few things (this didn't cost me a single penny - I had all the supplies on hand). I also love it because it's totally customizable! I think I'm going to make two more to hang above my kids' beds!

Thursday, June 24, 2010

Fun bottle-tags!

I've been keeping a few extra kids at my house while schools out this summer, and I like to make sure that they can always grab some water whenever they are thirsty. However, I was tired of refilling tiny plastic cups every 5 minutes, so I started to use some "sport-like" water bottles. The problem then became remembering which was whose throughout the day (especially since I only have one pink one, and the 3 girls each LOVE it). I started out using packing tape with their names written on them, but that got to be a big sticky mess when washing the cups at the end of the day.

SO ... VOILA! These cute and really easy name tags were born. I started with some decorative elastic (I think it's made for kid's jewelry-making). The kids got to pick a unique button out of my stash, then we added their names with beads, and I tied it into a knot around the cups (for a little extra holding power I applied a little hot glue to all the knots).


They are stretchy so I can take them off at the end of the day while I wash/dry the dishes or while the other kids aren't here. They have been a great and frugal solution for a minor yet irritating problem!