Thursday, May 19, 2011

Sticks and stones may break my ... jeans?

My daughter has always been pretty easy on her clothes. We get a lot of things passed down to us from a cousin, and by the time we are ready to pass them on again, they are usually in the same condition as they were when we acquired them (with the exception of paint splatters here and there ... she's an artist, you know).

However, this past year we started something new: Kindergarten. And wow ... has she ever been mean to her clothes recently! She's got holes in shirts that I thought were indestructible, and those school lunches ... let me just say the stains are nearly impossible to remove! Mostly we don't mind a little stain here and there, but the holes are a force to be reckoned with, particularly in the knees of her jeans. She is pretty laid back when it comes to fashion, but she will not, and I mean NOT wear jeans if they have "knee holes".  Like these for instance:


Perfectly good pair of jeans, not ready to be thrown out, but not being worn. Well, I finally found a solution to the problem that we both love. I get to go for a while longer without ditching clothes unnecessarily, and she gets to wear something she thinks is amazing. It's a simple patch job.

Now, before I start in on my instructions, let me make clear that I am not a pro. What I did today was the first time I've ever tried to patch something, and I threw it together using knowledge from other projects I've done in the past. This might not be the "right" way to do this ... but it worked for me. If you have tips I would love to hear them!

Okay ... so what you need:

  • A pair of jeans with holes (or without - if you are just feeling extra creative one day!)
  • A small scrap of coordinating fabric
  • Embroidery floss to match the fabric
  • Iron-on adhesive (I use Heat-n-Bond ... LOVE this stuff)
  • Cardboard for template (optional)
  • Needle and scissors ... no machine necessary!!

The first thing I did was to make some cardboard templates:


This step isn't 100% necessary, especially if you are a pretty decent artist. You could draw directly onto the back on the Heat-n-Bond if you wanted to. I like to use a template because I save them for later if I ever need it again. 

Next, you iron your adhesive onto the wrong side of your fabric. Make sure you follow the instructions that came with the adhesive that you are using. Mine says to iron for 6 seconds ... easy peasy.


Then I used my cardboard template to trace the pattern (hearts in this case) onto the paper-back of the adhesive. Remember if you are using a template that has a right versus a wrong way (like a letter for example) you'll need to trace your template upside down.


Next, cut out your pieces and lay them out on the jeans to decide where you want them to end up. I wanted to cut out more than just the hearts to cover the holes in the knees ... just a single knee patch wouldn't have looked right in my opinion. 


Then you iron the pieces down, again following the manufacturers instructions (mine said to iron 2 seconds, I went just a bit longer since the jeans are thick). Next break out the embroidery floss and stitch the pieces down with a simple backstitch. I used 3 stands of floss, doubled for a total of 6 on the needle at once. To do a backstitch, you come up through the fabric, then go down back to the underside about 1/4" away from the beginning stitch, then up again 1/4" away from when you stitched down ... and then back down in the spot where you stitched down before. Wow ... that sounds WAY more confusing than it really is. Here are a few pictures that should help. You also can see what the back of the fabric will look like:


I like to do one more good press with the iron after all that stitching, and then you should be ready to go!


She loves them, and I do too! 

Now if I could only think of a creative way to save my son's jeans, I would be in good shape! Something makes me think he really wouldn't appreciate the hearts on his knees ...

Monday, January 24, 2011

Out with the old t-shirt, in with the new summer top!

This past Sunday I had a "summer bug" and needed to create something summery before these doldrums of winter just wore me out! So (after building a snowman with my kids), I took an old t-shirt of mine and turned it into a cute summer top for my daughter! It was super easy and went really quickly! Here are the instuctions:

You'll need:
  • old t-shirt
  • scissors
  • elastic thread
  • regular thread
  • ribbon
Okay, here we go ... first, do a little online research on "shirring" fabric. I'll give you a quick breakdown here, but I watched a few videos on YouTube before I attempted this project. Here is the video that I found most helpful.

Second, find an old t-shirt in your closet that you don't want anymore. This one was a medium or a large, and was just a bit short on me:


Next, cut it right below the arm holes. This step doesn't have to be exactly perfect (one more reason to LOVE this project!) and a rotary cutter is nice, but not necessary. I actually cut the front of the top a little higher than the back - and not intentionally - but the end result is still super adorable and actually looks like I designed it that way (and only you know differently!!):


Next ... get ready to shirr the fabric! 
  • You'll hand-wind your sewing machine bobbin with the elastic thread, being careful not to stretch it too far while winding. Then just place in your machine as usual. Use regular thread on the top of the machine. I used orange on the top to match the fabric, and plain white elastic in my bobbin. 
  • Then you will want to set your sewing machine tension about as high as it goes (I cranked mine up all the way).
  • You'll also want to use the longest straight stitch that your machine allows.
  • Finally ... keep in mind that while sewing you will want to gently pull the fabric in the front to get the "stretchiness" right. I would recommend sewing on some scrap fabric first to get the feel of it before beginning (or else you'll have to rip out a few rows and start again, like I did)
I didn't mark my fabric, but used my sewing machine's foot as a guide to make my stitches about a quarter to a half inch apart:


No need to hem down the top (though you could) if you are using a t-shirt as it won't fray, and it ruffles beautifully. 

That's about it! I could have been done here, but my fabric didn't gather as much as I wanted, so I had to add some straps to ensure it didn't fall off of my little girl. If you want to add some straps, just try it on your model and pin the straps in place where you want them:

Then I used a plain old zigzag stitch (but remember to use regular thread in your bobbin and re-adjust your tension) to stitch the straps in place. Then you are finished!


After all was said and done I added a little embellishment to the front using some buttons I had in my stash ... but it's really not necessary. I love this project because it's adorable and super easy! I plan to make many, many more this summer! Time to hit some thrift stores! 

Wednesday, November 10, 2010

Felt Tooth Pillow

I've decided that the tooth fairy has a hard job. I mean, digging around under the pillow of a sleeping kid just to find a teensy-weensy little piece of bone? Not to mention trying desperately not to wake up that sleeping child in order to keep her identity a secret. It must be difficult.

The tooth fairy tried to visit our house a few nights ago, and it wasn't pretty. I heard that she searched for nearly 10 minutes to find my daughters tooth, even though we had thoughtfully placed it in a plastic sandwich bag so that it would be easier for her. When she finally felt that bag in her fingers and yanked ... she nearly woke the silly girl who had a death-grip on that plastic baggie in her sleep! Needless to say ... the tooth fairy gave up after that, and left my daughter a note saying she'd be back the next day.

To make it easier for her (she's got at least 24 more trips to our house ... YIKES!), I made this tooth pillow out of a few pieces of scrap felt that I had laying around. It was pretty easy: trace tooth shape onto two pieces of white felt, sew pink pocket on one side (leaving top open), place white pieces right-sides together, sew - leaving a space to turn inside out, turn inside out, stuff, and stitch the opening closed. Okay ... it sounds a little more involved than it really is. Anyway, I thought it turned out pretty cute, and thought I'd share!


Anyone else have a crazy tooth fairy story to share?

Thursday, October 28, 2010

Recipe Share: Pumpkin Bread

It's that time of year! Of course, I love pumpkin year-round - in the summer I make pumpkin cheesecake or pumpkin ice-cream pie - but right about now I start craving some good ol' pumpkin pie or this fabulous pumpkin bread:

Pumpkin Bread
makes 2 8x4 loaves, or 1 9x5 loaf

Ingredients:
15 oz. can pumpkin (not pumpkin pie mix)
1 2/3 cups sugar
2/3 cup vegetable oil
2 tsp vanilla
4 large eggs
3 cups all-purpose flour
2 tsp baking soda
1 tsp salt
1 tsp ground cinnamon
1/2 tsp ground cloves
1/2 tsp baking powder

1. Preheat oven to 350 degrees. Spray the bottom of the loaf pan(s) with cooking spray, or grease with shortening.
2. In a large bowl, stir pumpkin, sugar, oil, vanilla, and eggs until well mixed. In another bowl, mix together the remaining ingredients (I use a whisk to make sure everything is well-incorporated). Stir the dry ingredients into the pumpkin mixture.
3. Divide the batter evenly between two 8-inch pans, or pour all into a 9-inch pan.
4. Bake 8-inch pans about 1 hour, or a 9-inch pan 1 hour, 15 minutes (or until toothpick inserted into the center comes out clean). Cool 15 minutes on a wire rack in the pans.
5. Flip the bread out of the pans and allow to cool on a wire rack for 2 hours (if you can wait that long!)
6. Enjoy within 4 days if stored at room temperature. Or refrigerate up to 10 days.

I love this bread warmed up in the microwave with a little cream cheese for breakfast, or with a little ice cream for dessert. If you use this recipe, let me know how it turns out for you! Let me know if you change it at all, or how you enjoy it!


Monday, October 18, 2010

Truffula Tree noteholder

My daughter's Kindgergarten room is decorated in all-things-Dr.-Seuss. So when her teacher's birthday was approaching, I wanted to make her something that would go along with the decor, but also be incredibly crafty and easy enough for my 5 year old to help put together. So the following noteholder was born:


If you are familiar with Dr. Seuss' "The Lorax", then you'll recognize those bright colored tufts as Truffula Trees (and if you are not familiar with "The Lorax" then you are really missing out on a great book)! 
This craft was super easy to make, and my daughter was able to put most of it together on her own.

1. Gather your supplies. You'll need:
  • A foam ball (size will depend on the size of your desired finished project)
  • Chenille stems aka pipecleaners - green (we used 3 varying shades, about 16 per color), 3 yellow
  • Green paint (we used 'spring green')
  • Thin feather boas in pink and green
  • Paintbrush, black permanent marker, jewelry wire (see step 2), craft knife
  • Super-excited helper (optional)
2. Using the craft knife, cut the foam ball in half. I found that the easiest way to do this was to make a slit in the foam all the way around, and then I wrapped the jewelry wire around the ball and pulled tight, and this made a perfect cut. If you have a longer craft knife I'm sure you could use that instead.
3. Paint the half of the foam ball green - perfect job for little hands - and let dry:
4. While drying, prep the chenille stems: 
     Green : Cut each stem into fourths (we didn't do exact measurements, just folded in half twice and cut). Then take each fourth and fold in half without cutting - this leaves the 2 "pointy" sides together so that the finished product won't have any sharp edges).
     Yellow: These will become the trunks of your truffula trees. Take a bit of a feather boa and wind into a loose ball, then wrap the chenille stem around the middle of the ball, bend the stem around the center of the ball, and then twist the ends tightly to secure it in place (see below). Then, use the permanent marker to draw random and slightly haphazard black lines on it. 
 5. Place the finished trees into the foam ball by poking the stems into the foam. No need to glue!
6. Add the green "grass" by poking the pointy ends of the green stems into the foam ball around the trees. We didn't use any sort of system on this step, we just started adding them randomly and filling in 'gaps' as needed.
7. Write a fun note on a small scrap of paper and smoosh it between the blades of grass, then show it off, because it's SO ADORABLE!


Saturday, August 28, 2010

12 Skills in a Year - Halfway Point Check-In

I know, it's almost the end of August. The halfway point of 2010 has already come and gone. But I wanted to write a quick check-in post about what I've accomplished so far this year with my "12 Skills In a Year" New Years Resolution.

If you aren't familiar with this adventure of mine, please check out the posts already dedicated to this subject:

January - Knitting
February - Blogging
March - Cross Stitch
April - Nothing
May - Coupon Clipping
June - Plarn

  P.S. The July and August posts are coming, I promise. Things got a little hectic at the end of the summer so I've been behind a bit.

Having completed learning the ropes and practicing almost 7 new skills this year, I've gotta say this is one of the best New Year's Resolutions I've ever attempted. For one thing, I have a rough case of anxiety. The severity varies from day-to-day and month-to-month, but having a few hobbies to focus on has given me something besides stress to dwell on, and that's been terrific. Also, just the act of creating something or practicing something new (particularly with knitting) calms my frazzled nerves pretty quickly.

The seemingly endless possibilities of having these new skills are another great thing about this resolution. For the past 2 years, I've attempted to make most of the Christmas gifts for my family and friends. I'm usually scrambling during the last 2  weeks before the holiday trying to come up with really simple ideas and putting them together without much success. This year, I've already completed 2 gifts for my family, and it's not even September! And this time, I'm actually quite pleased with the results and am looking forward to handing out the presents. In fact, it's taken a great deal of willpower not to hand things out already!

I hope you've enjoyed reading about my adventure ... now, I have a few more fairly inexpensive skills lined up for the remaining months of the year, but I'm asking for some assistance here. With my family in a bit of a financial pinch that's not likely to let up anytime soon ... do any of you readers have any skills with a relatively minuscule price tag that you'd suggest I attempt in the coming months?

Wednesday, August 25, 2010

12 Skills in a Year - June (PLARN!)

First, say it with me: plarn. Yes, plarn. Plarn is SUCH an awesome word. Even more awesome, it's super easy to "make"! If you aren't familiar with plarn, it's basically just long strips of plastic that you can use just like yarn or string. Plastic + Yarn = Plarn.

For a while now I've been considering reusable shopping bags. We come home from the grocery store with ridiculous amounts of plastic bags, and even though I usually reuse them, I always feel bad about the sheer amount that I have in my trash can after a trip to the store when my 'plastic bag containers' are already full. So I was actually thinking about other ways to use those bags when I stumbled upon plarn on the internet.

My first thought was "what in the world would someone do with something like that?", but then I searched further and found lots of fascinating, practical, and interesting things that people were making with plarn. I found a great tutorial on making it here:

http://www.myrecycledbags.com/2007/02/17/instructions-for-cutting-plastic-bags-creating-recycled-plastic-yarn/

If you know how to knit/crochet already, then make some plarn (it's pretty much free!) and give it a go. It's just about as easy to use as a regular yarn. I have started to make a reusable shopping bag from my ball of plarn (ironic, huh?). I'll post a follow-up with a picture as soon as I get it done. Other project ideas that I LOVE are coasters, rugs, and bowls (my next plarn project). But seriously, anything you could knit or crochet, you could make with plastic yarn ... though I'm not sure I'd suggest a Plarn Afghan or anything.

Sunday, August 15, 2010

The easiest finger puppets ever!

A while back, I tried to have the kids make their own puppets out of paper lunch bags. I figured it would give them something new thing to play with, something they would be proud of and would keep for a while. The craft went well, and I thought the puppets were SUPER cute, but the kids didn't play with them long. In fact, I think the excitement only lasted about 10 minutes.

The problem with the paper bag puppets was that they were too big and awkward for little hands to maneuver. So then, these little dolls were born. They let the kids use their fingers as "legs" and the thumb and pinky finger as "arms", and they were easy enough for even my 3 year old to play with.

Take a look at our fancy and cheap puppets:


If you wanna make your own:

1. Cut out a pear-shape on a piece of construction paper or card stock. The card stock would probably be better, our construction paper puppets got kind of droopy after a while.
2. Cut out two "finger-holes" at the bottom, wide end of the pear-shape. These are for the "legs".
3. Have the kids draw on a face and clothes.
4. Cut some hair out of a separate piece of construction paper. glue to the back of the head and then add ears, a hair bow, earrings, etc.
5. PLAY!

The kids played with these in a dollhouse for nearly 2 hours! The only reason they quit was because the paper started to tear and the puppets started to fall over. Next time, we'll use card stock. I just have to go and buy some first!!

Thursday, August 12, 2010

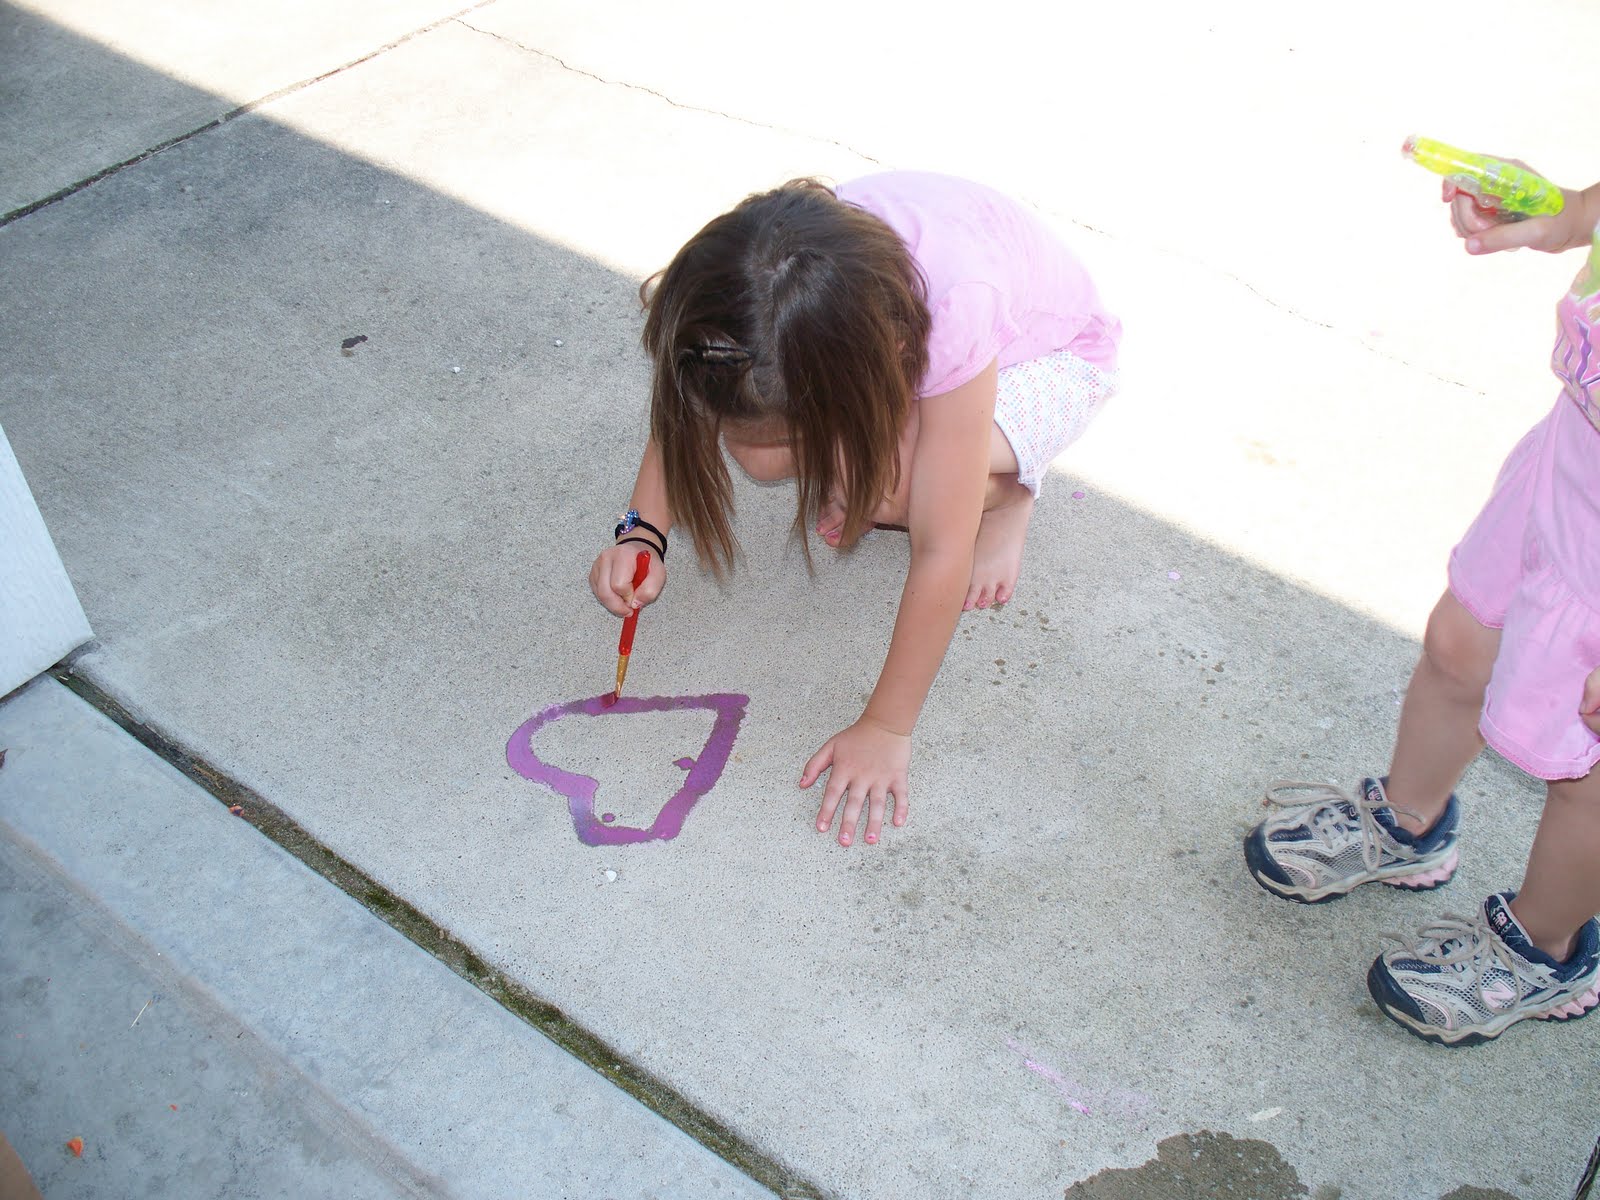
Homemade Sidewalk Paint

I love sidewalk chalk. To me, sidewalk chalk is a mother's dream-come-true for her artistic children. There is usually more than ample space for the kids to draw, and it washes away easily with a hose or a steady rain.

However, my kids prefer painting over coloring. Something about that brush makes them feel extra creative and excited. So I did a little research online for an inexpensive paint to use outside that would wash away as easily as sidewalk chalk (and that is totally non-toxic) ... and I found the perfect "sidewalk paint".

Mix together equal parts cornstarch and water in a large bowl. Pour into individual cups or bowls and then add food coloring to make different colors. Then paint like crazy on the sidewalk!!


I found that an old styrofoam egg carton was the perfect container for the individual paints. It gave the kids the opportunity to mix them to create even more interesting colors! I just filled only half of the cups and left the remaining empty.

Our paint washed away the next day with a good summer rain. Good thing it's easy to make more!

Sunday, August 8, 2010

Harmless childhood obsessions?

My son was recently handed down an old t-shirt with the Teenage Mutant Ninja Turtles on it. Now, that's fine by me ... I love hand-me-downs, and I think those Turtles are pretty radical, you know?

My problem arises from the fact that he never, ever wants to take the shirt off. He wants to sleep in it, go to family gatherings in it, even go swimming in it!! No matter the amount of dirt, grime, peanut butter and jelly, or chocolate on that t-shirt ... it's a fight to get him to take it off for me to wash it. And he's usually a pretty dirt-phobic little boy.

I'm pretty sure it's not gonna cause any psychological damage if I MAKE him wash it every once in a while, but I sure hate the fight that it causes!

Any advice?

Wednesday, August 4, 2010

At the Car Wash, yeah!

It has been about a million degrees and ridiculously humid here recently, so we've had to spend a lot of our time indoors. However, kids don't do well cooped up for too long ... and I could tell that tempers were getting short and toys were getting boring, so I decided to let the kids wash my car one day.

This activity would have cost me pretty close to nothing, except I had to buy a hose and a few sponges. I filled a bucket with water and some dish soap, and let the kids go crazy. I think we were out there for an hour at least!

Please note, dish soap isn't the best thing to use for washing a car as it isn't really good for your paint. I personally am not concerned with the paint job on my car at all, and I figured dish soap would be easier on little hands than actual car soap. But please don't use it if you have an attachment to a nice, shiny, gleaming paint job.

I had totally forgotten how much fun a simple car wash could be!

Sunday, August 1, 2010

Fun with felt - DONUTS!

I recently went to our local craft store to buy something totally unrelated to felt, and wound up walking out of there with about 60 sheets of the stuff, due to a well-placed "SALE" sign. So now, with a bunch of felt on my hands and kids in the house to entertain, I'm resolved to make as many neat things out of it as I possibly can!

My first project was felt donuts. These were super easy! Just cut out the basic shape, sew the outside shut (I did it by hand with a kind of whipstitch ... but you could totally use a machine), stuff with a tiny bit of batting, and then stitch the inside closed! Then I cut out different 'icings' for the kids to use for mixing and matching. I added 'sprinkles' to some of the icing by sewing with some thick craft thread and an embroidery needle.


My kids adore these! I think I'll probably make another few sets of them. If you didn't have really little kids in the house, you could even sew up some donut holes to go along with the set, out of the circle cut from the middle. But I was worried they'd be too small, so I'm saving those little circles for some other fantastic project .... I just don't know what that will be yet!

Thursday, July 29, 2010

Headbands and elastics and scrunchies, OH MY!

My daughter and I have been sharing a drawer for hair barrettes, combs, and clips for a while now. I don't mind sharing spaces with her, but she is getting more and more "girlie" every day, and we have been running out of space in our small bathroom to keep everything organized. So while I was at the dollar store recently, I spotted a box of 10 small, adhesive hooks for - you guessed it - $1.00 ... and I found her a space in the bathroom to keep her barrettes neatly organized.


She loves having her things hanging here, separated from mine. I think I might need to add a small mirror to the other door ... but of course then I might never get time to get myself all dolled up in my own bathroom anymore!

I think I'm gonna buy some more of those little hooks and try this neat trick in my kitchen! No more disorganized measuring spoons!

P.S. By the picture, I think my husband is excited at the prospect of no longer finding these things all over the bathroom floor! 

Sunday, July 18, 2010

Making an Idea Board

After cutting up a few old boxes a few months ago, I was left with 2 square pieces of cardboard laying around. It didn't feel right to throw them into recycling, so I decided to reuse them in a crafty kind of way.
I've always wanted one of those ribbon-laced memory boards that I used to see in everyone's college dorm rooms (except my own). I'm not sure if the ones that I have seen were made or purchased, but I didn't realize how EASY this project was until I tried it myself!

Here is how I created an "idea board" for my sewing/craft space out of 2 squares of leftover cardboard:

Materials: Cardboard, batting and scrap fabric (to cover front of cardboard), ribbon, hot glue gun and glue sticks,

1. Trim cardboard until it's relatively square. It really doesn't have to be perfect. Now, I imagine you could cut the cardboard out to any shape/size that you wanted. I almost made 2 matching boards but I decided to tape my 2 squares together to form one long rectangle.


2. Iron and lay out your fabric (right side down), then lay batting on top of fabric. Make sure that the batting exceeds the sides of the cardboard just a little (maybe a quarter of an inch or so), and the fabric should stretch at least an inch and a half around all sides.

3. Lay the cardboard piece on top of the fabric and batting. Working with one side at a time, stretch the fabric snugly over the cardboard and use the hot glue gun to glue the fabric to the back of the cardboard piece.


4. Once the glue dries, lay the ribbon out on the front of your board in the design that you would like. I used long pins to hold my ribbon in place while I glued each individual piece. Also, be sure you that you really pull the ribbon tight against the face of the board. If it's not tight it won't hold your things well. Once you've got the ribbon in place, glue to the back of the cardboard.

5. Finally, I used a heavy-duty needle and thread to sew (straight through the cardboard) buttons on all the placed where two strands of ribbon intersected. I glued a braided ribbon to the back to use for hanging, and hung on a push-pin on my wall.


This project is SO easy! None of the steps have to be perfect (notice no real measurements here) in order to get a fantastic end-result. Also, it's totally frugal even if you do have to go out and buy a few things (this didn't cost me a single penny - I had all the supplies on hand). I also love it because it's totally customizable! I think I'm going to make two more to hang above my kids' beds!

Wednesday, July 14, 2010

Edible Jewelry

Never underestimate the power of "snacks on a string". Kids love them.


For these we used extra long pieces of licorice strung with a few different types of cereal, some cereal straws, and a few pretzels. Bonus ... I didn't have to take any extra food with us to the park in case someone got hungry.

Saturday, June 26, 2010

Recyclable Recycling Boxes

As I mentioned in a previous post, we've started a recycling program in our house. It's been about a month now, and I'm pleased to report that it's going GREAT! The kids LOVE to throw stuff into the boxes, and they even look on the bottom of plastic things in the store or out at restaurants to see if it is a #1 or #2 plastic (the only kinds that we are able to recycle right now).

I thought I'd share a quick post about the boxes that we use for our recycling stuff. They were leftover from a recent move ... I shut the boxes, flipped them on the side and opened up the top with a craft knife. Then we covered them with some wrapping paper and the kids drew earth pictures on them. It was a super easy way to re-use some boxes for a good cause!


P.S. I even made something else out of the cut-out top of the box! More on that in a later post!

Thursday, June 24, 2010

Fun bottle-tags!

I've been keeping a few extra kids at my house while schools out this summer, and I like to make sure that they can always grab some water whenever they are thirsty. However, I was tired of refilling tiny plastic cups every 5 minutes, so I started to use some "sport-like" water bottles. The problem then became remembering which was whose throughout the day (especially since I only have one pink one, and the 3 girls each LOVE it). I started out using packing tape with their names written on them, but that got to be a big sticky mess when washing the cups at the end of the day.

SO ... VOILA! These cute and really easy name tags were born. I started with some decorative elastic (I think it's made for kid's jewelry-making). The kids got to pick a unique button out of my stash, then we added their names with beads, and I tied it into a knot around the cups (for a little extra holding power I applied a little hot glue to all the knots).


They are stretchy so I can take them off at the end of the day while I wash/dry the dishes or while the other kids aren't here. They have been a great and frugal solution for a minor yet irritating problem!

Wednesday, June 23, 2010

12 Skills in a Year - May (Coupon-clipping)

As life can (and often does) throw twists and turns into even the most well-thought-out plans, I came into the month of May not having any extra spending money to use on a craft to learn as a new skill. So, with that in mind, I started clipping coupons. This is something I really never did before. Not because I couldn't use the savings, but just because it never occurred to me.
I have several friends who have used the services of a "coupon guru" online - the website/company finds deals and coupons and sends them to you ... for an upfront, monthly price; my friends swear that they've saved tons of money and stocked their shelves to the brim. However, I'm not going to pay someone else to find coupons for me ... maybe I'm old-fashioned, but that seems counter-intuitive.
So I started getting the Sunday paper, watching for coupons in the magazines that I subscribe to, and keeping a lookout online. I also found a great resource in a blog called Couponing 101 - www.couponing101.com.

I must say, this is a skill that (even now into the end of June) I'm still trying to REALLY master. I've saved some money here and there ... but nothing like stories I've heard from other blogs. However, I once scored a brand new $8.00 razor for 99 cents! The trick is combining the coupons with in-store sales/discounts. So not only do you need to clip/print the coupons, but watch the flyers of your local grocery/retail stores as well.

P.S. The blog above is a GREAT place to start if you are interested in learning the ins and outs of really saving you some cash. If you have any other resources, please leave me a comment!

Saturday, June 5, 2010

Pretzel coating fun!

My daughter loves the chocolate-covered and sprinkle-laden pretzels that you can usually only find around the holidays. For the last few weeks she's been asking for them, so one day recently I decided that we'd attempt to make them at home. It's actually a fairly inexpensive activity, and cleanup is relatively easy ... what else could a mother want? This would be fun to do on a rainy day when the kids need something fun to do indoors to keep them entertained ...

First, you'll need to buy some pretzels ... obvious, I know. Next, you'll need to find the coating. Now, for this I suggest Almond Bark. It's pretty cheap (which is nice in case you wind up wasting a batch by dropping it on the floor ... I'm just saying) ... and it melts up beautifully in the microwave. Just follow those good old package directions, they won't let you down. You can usually get Almond Bark in a few flavor options in the baking aisle of the grocery store. I also recommend having some wax paper handy.

Then ... let the pretzel fun begin! Simply heat up the Almond Bark, dip the pretzels in, and let them cool on some wax paper! If you are adding sprinkles or decorations of some kind, do that before they cool, or the sprinkles won't stick right. We also found that fishing the pretzels out of the chocolate is easiest for little hands if you let them use a fork:


The fork will help the excess chocolate drip off before placing on the wax paper. That way you can make a lot more pretzels and don't wind up with a pretzel completely lost in a mound of hardened chocolate.

By the way ... don't feel limited to pretzels with this activity either! Try dipping bananas, animal crackers (my personal favorite), strawberries, or summer sausage! ... ... ... Nevermind that last suggestion, I got carried away there.

Thursday, June 3, 2010

12 Skills in a Year - April (an explanation)

I didn't learn a new skill for April. I don't think of it as a failure, because I had a lot of very stressful, very important, and very time-consuming occurrences happen in April. And, to be honest with myself, I did learn a *lot* of new things in April, though I'm not sure any of them would count as a skill. So ... I may have missed out on my New Year's resolution ... but I do plan to continue on strong through the end of the year.

Everyone and everything is fine now, but I wanted to post an explanation as to why there is no formal "April skill" posting. :)